After upgrading my hardware to the latest and greatest, I became dissatisfied with the computer case options currently available to purchase. I also began looking into tripling the monitor setup to increase my work space and allow more viewing capability for fun activities, including photography and gaming.
Old computer case . . . not so cool.
Dusty and on the floor. I needed something else.
Dusty and on the floor. I needed something else.
 |
| Mid-March, 2013 |
Idea for New Computer Case
The desk would:
- have a built-in case.
- use existing glass top from old desk.
- filter air flow, just enough to keep dust bunnies out.
- incorporate a lifting mechanism -- allowing me to sit or stand at a push of a button!
- This also has the added bonus of lifting the computer from the dusty floor.
Okay, so my plans are maybe a little over the top. I tend to overcomplicate projects from time to time.
Ready . . . Set . . . GO . . .
Sketched the basic design out on paper, using my superb drawing skills.
 |
| March 17, 2013 |
which "(also known as Trimble SketchUp) is a 3D modelling program for a broad range of applications such as architectural, civil, mechanical, film as well as video game design — and available in free as well as 'professional' versions."

A few days later the plans were completed.
 |
| End of March, 2013 |
___________________
Time to order parts!!!!!!!
Fans
For the air flow filtration that best works with the structure of my new desk design and needs, I decided to go with 120 mm Vortex fans (x 5), which all have PWM control.
"PWM-FUNCTION PWM stands for Pulse Width Modulation. The 4-Pin connector allows the mainboard to control the fan speed from 800-1500RPM."

___________________
Legs
For the legs, I chose 18 inch extendable satellite actuator arms (x 4) from eBay, at $50 US a pop. Although normally used for satellites, they would definitely have enough torque to work for the type of elevation system I wanted to create. This was a far less costly option than the pre-built legs, which have a price range in the hundreds for the low-cost, low-quality models and only go up from there. (Note: eBay price for actuator arms changed shortly after to $100 each)

_____________________
Wood
Ton of wood from Home Depot, all ready for cutting.

___________________
Structural Support
Heavy-duty linear guide rails, with 22" extension capability (x 4) to function as the vertical, internal track on the elevator legs.

___________________
Details
Plans printed out from Google SketchUp:

Mid-section Base & Legs (above),
| Side Panels & Inner Panels with Air Flow Ducts (below left), Desktop Panels (below right) |


Little bit of info on the satellite actuator arms.


Heavy-duty linear guide rails 22" extension, next to a fully extended actuator arm. The idea is the actuator arms hold the load, the guide rails keep the legs in line. Together, they should keep the desk from rocking to much.

Also, I had to purchase several tools to cut the wood . . . ya, what a drag.

___________________
The desk is built from the top down around the glass dimensions.
 |
| Left Side |
 |
| Left Side - Testing with Glass Top |
The measurements must be no more than a 16th of an inch off, or nothing would fit.

Center and sides are joined together.

 |
| Early-April, 2013 |
The glass fits in a lip cut along the top of the desk.

Time to place the bottom. 3/4" base.

So, wood screws are not the prettiest to look at, but they get the job done.

Gutting motherboard & power supply mounting plate from my old case.


1/2" wood used for the back of the case area.


 |
| Mid-April, 2013 |
Looking good!

Now that the desktop is mostly completed, I started in on the legs.

Some reinforced mounting holes. Metal plates from random aisle in Home Depot.

 |
| Detail of Metal Plate in Place |


It didn't fall over!!!
 |
| One Week Later |
Closeup of actuator switch. Cut off switch is triggered at min or max height.

Testing the lifting power.


Rounded off the feet and added cross support.


Afterthought: added a shelf for all my external parts.

Almost done!


___________________
Finishing
Applying wood stain with my helper!
 |
| Last Weekend of April, 2013 |


Completed semigloss.


Prepped legs for staining.


Purchased a 36 v 10 amp PSU from eBay $40 US. Decided to build a mounting plate from type 22 gauge steel, for the power supply and switches.


___________________
Time to clean my office!

Testing desk position in the office.


Assembled legs after staining. By this step, I was ready to be done.


Desktop just placed on the legs.

Installed fans! The three in the center pull air in, the two on the sides & PSU push air out.

 |
| In Goes the Motherboard |


It wasn't too difficult to smile at this point!

Installing USB and audio jack hardware I had gutted from the old case.


 |
| May 12, 2013 |
___________________
Three Days Later
My new screens just got in! (Plus a couple odds and ends.)
- 1x ASUS VE278Q Black 27" Full HD HDMI LED Backlight LCD Monitor w/Speakers
- 1x ASUS PB Series PB278Q 27" 5ms (GTG) WQHD HDMI Widescreen LED Monitor
- 1x EVGA 04G-P4-2673-KR GeForce GTX 670 Superclocked+ w/Backplate 4GB 256-bit GDDR5 PCI Express 3.0 x16 HDCP Ready SLI Support Video Card
- And another ERGOTRON 45-241-026 LX Desk Mount LCD Arm


Watch out, monitors can get feisty!

Screen Setup
- center - 27" Asus PB278Q LED Backlight 1440p,
- right - 27" Asus VE278Q LED Backlight 1080p
- left - 27" Asus VE276Q CCFL Backlight 1080p

Installing GTX670


NVIDIA Surround Configuration - Resolution is 5760 x 1080


 |
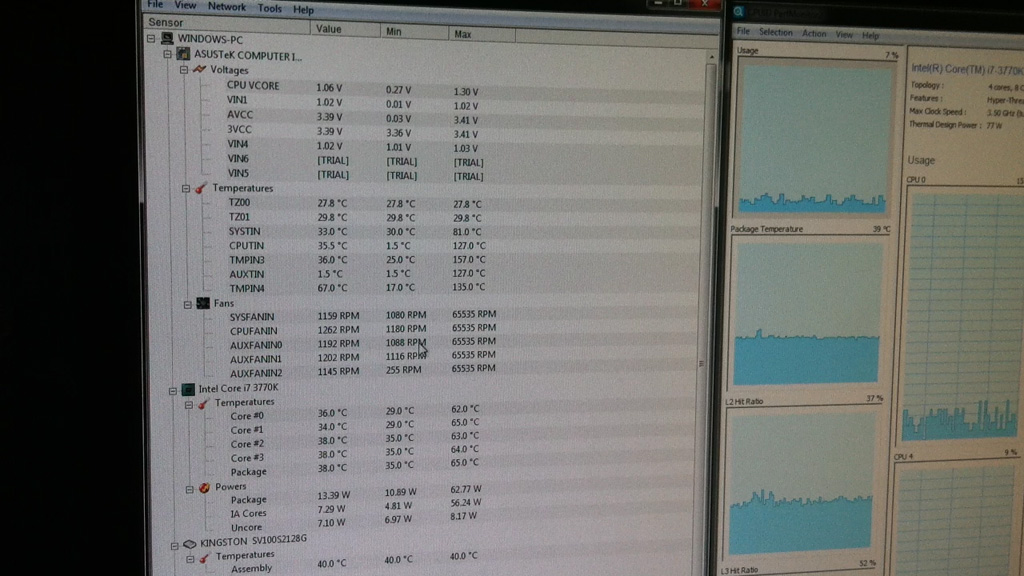
| Performance test on all aspects of the computer. Scores are good! |
___________________
Drum roll!
Before
After

Standing position.


To Do
- Automate desk lifting controls with Raspberry Pi and relays.
- Clean up desk wiring.
- Install additional temperature sensors.
___________________
Video
___________________
Build Plans
Not all of the project was
documented, following is whats left after the build. And allot of things
I made up as the project progressed.


This is the wiring, from the image below. You can see that when
switched one side to the other, voltage is reversed. Couldn't find the
correct switch object when I made this.

This is to bypass the automated control's that I have yet to complete.

Google SketchUp plans - http://www.filedropper.com/lorenscomputerdesk
MD5 - 44319e40a1f5d8bd8461a6cac46027bd
https://www.dropbox.com/s/n28u86mj2mnrdcn/LorensComputerDesk.skp
https://www.dropbox.com/s/n28u86mj2mnrdcn/LorensComputerDesk.skp

Amazing project ! I've never seen a better PC "corner"
ReplyDeleteThanks Legwinskij
DeleteHow long did this take? And how much did it cost? Looks amazing
ReplyDeleteOver all, from the initial concept to completion was about 14 weeks. Cost in parts for the desk only, maybe $300 wood & materials, $200 for the satellite actuator arms, $40 for the legs power supply. With shipping and other misc costs maybe around $600 total.
DeleteSo essentially if I wasn't worried about the sit/stand aspect so much as the awesome case-in-desk idea for a corner workstation, it would take about 12 weeks and $3-400? That sounds quite reasonable. Excellent design both visually and economically! Can't wait to see the plans should you choose to release them.
Deleteare you planning on posting your plans some where
ReplyDeleteI could, but don't think it will help anyone, as this desk has a glass top from another desk.
DeleteI strongly feel you should share :) (I want one) -- glass top or not, thats just 3 top parts that need changing or getting custom glass!
DeleteVery cool!
I second the releasing of the plans. I have the same desk so the glass isn't an issue for me.
DeleteVery nice build by the way.
Will do then.
DeleteWhere are these mountains on your background triptychon ?
ReplyDeleteI took the photo from the top of Mont Blanc, in France.
Deletehttp://en.wikipedia.org/wiki/Aiguille_du_Midi
The Aiguille du Midi (3,842 m) is a mountain in the Mont Blanc massif in the French Alps.
The name "Aiguille du Midi" translates literally as "Needle of the Noon" or "Needle of the Mid-day". In the brochure for its cable car the Compagnie du Mont-Blanc asserts it gets its name from the fact that it is to the south when viewed from in front of the church in Chamonix.[2]
Lots of really cool ideas all rolled together. I like the idea of a PC case within a desk. For your sake, I hope the ATX form factor doesn't go out of style anytime soon!
ReplyDeleteDid you have to take any special steps to ensure good grounding of all the components since they weren't inside a metal case?
Thanks Fred, I think that ATX has a few more years left.
DeleteI did not, but could add a ground to all the parts. Maybe when I get into the next stage of automating the legs.
This looks awesome, very impressed. If your center monitor is 1440p and other monitors are 1080p, does that mean you run the center at 1080p during fullscreen gameplay?
ReplyDeleteYep 1080p when gaming. I could run 1440p center screen only if the games supported but then lose out on the peripheral views.
DeleteThis may end up being an option, as I find the extra visuals to be almost a distraction, or information overload in FPS games.
Try to change power for actuators from 12V to up to 36V, it will speed up lifting. We have nuclear shelter doors opening with the same actuator, check https://www.facebook.com/photo.php?v=1779429972001&set=vb.183017958383755&type=3&theater
ReplyDeleteLegs are running at 30v DC. Cool idea to have it open a heavy door.
DeleteThat project is completely awesome. Real talk.
ReplyDelete(Didn't know Dave Grohl dyed his hair, and had dem hacker skillz)
If you say so...
DeleteHow do you have the optical and hard drives mounted?
ReplyDeleteWhy not put the components that are on that shelf in one of the side portions? Wrap everything up all nice and neat. Even if it is a bland component, a bit of lighting could make it look cool.
DVD drive is in an external case, hard drives are under the glass towards the left side.
DeleteThis was my first idea, but ended up using that space for the case air flow.
Wonderful build. We have sit stand desks at work, but the machines sit on the desk (laptop dock) or on the floor with long cables that run through a plastic umbilical. They paid originally $10k each, now around 7k. Our desks have preprogrammed "favourite" buttons for height settings.
ReplyDeleteYep, was not in my price range...
Deletecan you give a idea how you wired the actuator arms, i saw this and thought it would be perfect for a sepearte project, but i'm kind of curious how you wired everything (kinda a newbie). Maybe a wiring diagram?
ReplyDeleteWill post all the build plans. Hope it helps!
DeleteShare the mechanism at least, man! I have planned something like that, but I didn't really know how to start with it besides the woodwork.
ReplyDeleteI have uploaded some of the plans.
DeleteThis is some amazing work. I really like it. I and others will be interested in knowing more about it.
ReplyDeleteI Love your work! Will do this project someday on my spare time.
ReplyDeleteLove it
ReplyDeleteLove this desk Loren ... you've done a beautiful job!
ReplyDeleteCan I ask, how solid is the final desktop, especially in the raised position? I would like to do the same for a music production desk that would support drum pads and a midi keyboard that get bashed away at.
Hi Stew,
DeleteYou can shake the desk a little at full standing position. Maybe if the feet covered more surface area it would move less. It's also standing on carpet, a solid floor would be more stable I would think.
What is the type of wood?
ReplyDeleteWhat is the thickness?
How are assembled the pieces?
This desk is fantastic. I would love to build one however the link to your Google SketchUp plans do not work. Would it be possible to upload them to dropbox or a google drive? I would gladly host them for you as well if you like.
ReplyDeleteSo been looking at custom desks because I was getting tired of the clutter and the way mine looked plus I hate the fact that I can't slide my chair under it due to the arm rests. I wanted to incorporate the glass top of my current setup into the new build and since I don't have the skills to work with metal figured wood was the choice. Then I saw that your starter desk is the same that I have and I was hooked. I am not looking to add the actuator, but I really like the rest of your setup. A bunch of people already asked for your design template and if possible I'd love to grab it as well, just to have something to start with. (mostly for the idea, as I'm not yet 100% determined HOW I want my desk to look like)
ReplyDeleteUploaded the project to dropbox.
ReplyDeletehttps://www.dropbox.com/s/n28u86mj2mnrdcn/LorensComputerDesk.skp
YOU ROCK!!
Deletedid you use a relay when you wired up the actuators? do you remember what relay you used and if it was a dpdt or a spdt relay?
ReplyDeleteMan this is good work!
ReplyDeleteI've already have a custom desk, I want to make it adjustable like yours...
Which model are your actuators? how much height can the desk reach?
I will really appreciate your answer
Where did you source the Guide Rails?
ReplyDeleteHome Depot had them.
DeleteI have a couple questions.
ReplyDelete1-How much noise do the actuators make? In the video it sounds very, very loud, but that might be microphone placement/sound reflections. I'm thinking if you raise/lower it a few times a day is it ok, or a real tough noise to endure?
2-After raising/lowering the desk a number of times, the actuators stay in perfect height sync with each other? i.e.: they aren't trying to be at slightly different heights, like maybe a ¼" difference?
Dude, that build is pretty awesome. You did some really solid work there.
ReplyDeleteyour file drop link is broken i was wondering if you could email them to me by chance? I love the top design and working on something similar. Beautiful design.
ReplyDeleteis there a pdf file for this? i badly need it. or maybe just email? thank you
ReplyDeleteThis is amazing.... I have been looking for something onlong the lines of this setup and here it is... hope you don't mind if i take this an build my own.
ReplyDeleteThis looks perfect for my studio room... both in shape and size!
ReplyDeletevery nice desk, kinda sad with this kind of station, you have such a lousy mouse/keyboard though haha.
ReplyDeleteWoww !! Thats Really Amazing man
ReplyDelete